Spring通知类型及使用ProxyFactoryBean创建AOP代理
在《Spring JDK动态代理》和《Spring CGLlB动态代理》中,讲解了 AOP 手动代理的两种方式,下面通过讲解 Spring 的通知介绍 Spring 是如何创建 AOP 代理的。
Spring 通知按照在目标类方法的连接点位置,可以分为以下五种类型,如表 1 所示。
ProxyFactoryBean 类中的常用可配置属性如表 2 所示。
在 Spring 通知中,环绕通知是一个非常典型的应用。下面通过环绕通知的案例演示 Spring 创建 AOP 代理的过程。
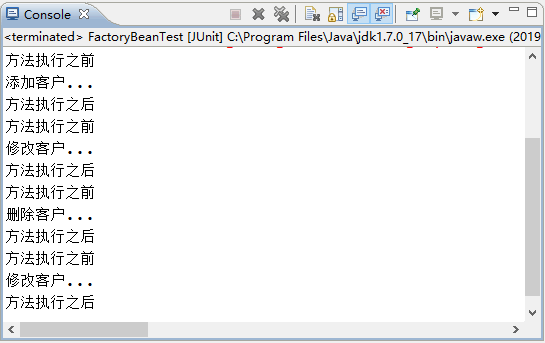
图 1 运行结果
Spring 通知类型
通过前面的学习可以知道,通知(Advice)其实就是对目标切入点进行增强的内容,Spring AOP 为通知(Advice)提供了 org.aopalliance.aop.Advice 接口。Spring 通知按照在目标类方法的连接点位置,可以分为以下五种类型,如表 1 所示。
| 名称 | 说明 |
|---|---|
| org.springframework.aop.MethodBeforeAdvice(前置通知) | 在方法之前自动执行的通知称为前置通知,可以应用于权限管理等功能。 |
| org.springframework.aop.AfterReturningAdvice(后置通知) | 在方法之后自动执行的通知称为后置通知,可以应用于关闭流、上传文件、删除临时文件等功能。 |
| org.aopalliance.intercept.MethodInterceptor(环绕通知) | 在方法前后自动执行的通知称为环绕通知,可以应用于日志、事务管理等功能。 |
| org.springframework.aop.ThrowsAdvice(异常通知) | 在方法抛出异常时自动执行的通知称为异常通知,可以应用于处理异常记录日志等功能。 |
| org.springframework.aop.IntroductionInterceptor(引介通知) | 在目标类中添加一些新的方法和属性,可以应用于修改旧版本程序(增强类)。 |
声明式 Spring AOP
Spring 创建一个 AOP 代理的基本方法是使用 org.springframework.aop.framework.ProxyFactoryBean,这个类对应的切入点和通知提供了完整的控制能力,并可以生成指定的内容。ProxyFactoryBean 类中的常用可配置属性如表 2 所示。
| 属性名称 | 描 述 |
|---|---|
| target | 代理的目标对象 |
| proxyInterfaces |
代理要实现的接口,如果有多个接口,则可以使用以下格式赋值: <list> <value ></value> ... </list> |
| proxyTargetClass | 是否对类代理而不是接口,设置为 true 时,使用 CGLIB 代理 |
| interceptorNames | 需要植入目标的 Advice |
| singleton | 返回的代理是否为单例,默认为 true(返回单实例) |
| optimize | 当设置为 true 时,强制使用 CGLIB |
在 Spring 通知中,环绕通知是一个非常典型的应用。下面通过环绕通知的案例演示 Spring 创建 AOP 代理的过程。
1. 导入 JAR 包
在核心 JAR 包的基础上,再向 springDemo03 项目的 lib 目录中导入 AOP 的 JAR 包,具体如下。- spring-aop-3.2.13.RELEASE.jar:是 Spring 为 AOP 提供的实现,在 Spring 的包中已经提供。
- com.springsource.org.aopalliance-1.0.0.jar:是 AOP 提供的规范,可以在 Spring 的官网网址 https://repo.spring.io/webapp/#/search/quick/ 中进行搜索并下载。
2. 创建切面类 MyAspect
在 src 目录下创建一个名为 com.mengma.factorybean 的包,在该包下创建切面类 MyAspect,如下所示。
package com.mengma.factorybean;

import org.aopalliance.intercept.MethodInterceptor;
import org.aopalliance.intercept.MethodInvocation;

//需要实现接口,确定哪个通知,及告诉Spring应该执行哪个方法
public class MyAspect implements MethodInterceptor {
    public Object invoke(MethodInvocation mi) throws Throwable {
        System.out.println("方法执行之前");
        // 执行目标方法
        Object obj = mi.proceed();
        System.out.println("方法执行之后");
        return obj;
    }
}
上述代码中,MyAspect 类实现了 MethodInterceptor 接口,并实现了接口的 invoke() 方法。MethodInterceptor 接口是 Spring AOP 的 JAR 包提供的,而 invoke() 方法用于确定目标方法 mi,并告诉 Spring 要在目标方法前后执行哪些方法,这里为了演示效果在目标方法前后分别向控制台输出了相应语句。
3. 创建 Spring 配置文件
在 com.mengma.factorybean 包下创建配置文件 applicationContext.xml,如下所示。<?xml version="1.0" encoding="UTF-8"?> <beans xmlns="http://www.springframework.org/schema/beans" xmlns:xsi="http:/www.w3.org/2001/XMLSchema-instance" xsi:schemaLocation="http://www.springframework.org/schema/beans http://www.springframework.org/schema/beans/spring-beans.xsd"> <!--目标类 --> <bean id="customerDao" class="com.mengma.dao.CustomerDaoImpl" /> <!-- 通知 advice --> <bean id="myAspect" class="com.mengma.factorybean.MyAspect" /> <!--生成代理对象 --> <bean id="customerDaoProxy" class="org.springframework.aop.framework.ProxyFactoryBean"> <!--代理实现的接口 --> <property name="proxyInterfaces" value="com.mengma.dao.CustomerDao" /> <!--代理的目标对象 --> <property name="target" ref="customerDao" /> <!--用通知增强目标 --> <property name="interceptorNames" value="myAspect" /> <!-- 如何生成代理,true:使用cglib; false :使用jdk动态代理 --> <property name="proxyTargetClass" value="true" /> </bean> </beans>上述代码中,首先配置目标类和通知,然后使用 ProxyFactoryBean 类生成代理对象;第 14 行代码配置了代理实现的接口;第 16 行代码配置了代理的目标对象;第 18 行代码配置了需要植入目标的通知;当第 20 行代码中的 value 属性值为 true 时,表示使用 CGLIB 代理,属性值为 false 时,表示使用 JDK 动态代理。
4. 创建测试类
在 com.mengma.factorybean 包下创建一个名为 FactoryBeanTest 的测试类,编辑后如下所示。
package com.mengma.factorybean;
import org.junit.Test;
import org.springframework.context.ApplicationContext;
import org.springframework.context.support.ClassPathXmlApplicationContext;
import com.mengma.dao.CustomerDao;
public class FactoryBeanTest {
    @Test
    public void test() {
        String xmlPath = "com/mengma/factorybean/applicationContext.xml";
        ApplicationContext applicationContext = new ClassPathXmlApplicationContext(
                xmlPath);
        CustomerDao customerDao = (CustomerDao) applicationContext
                .getBean("customerDaoProxy");
        customerDao.add();
        customerDao.update();
        customerDao.delete();
        customerDao.find();
    }
}
5. 运行项目并查看结果
使用 JUnit 测试运行 test() 方法,运行成功后,控制台的输出结果如图 1 所示。图 1 运行结果
所有教程
- C语言入门
- C语言编译器
- C语言项目案例
- 数据结构
- C++
- STL
- C++11
- socket
- GCC
- GDB
- Makefile
- OpenCV
- Qt教程
- Unity 3D
- UE4
- 游戏引擎
- Python
- Python并发编程
- TensorFlow
- Django
- NumPy
- Linux
- Shell
- Java教程
- 设计模式
- Java Swing
- Servlet
- JSP教程
- Struts2
- Maven
- Spring
- Spring MVC
- Spring Boot
- Spring Cloud
- Hibernate
- Mybatis
- MySQL教程
- MySQL函数
- NoSQL
- Redis
- MongoDB
- HBase
- Go语言
- C#
- MATLAB
- JavaScript
- Bootstrap
- HTML
- CSS教程
- PHP
- 汇编语言
- TCP/IP
- vi命令
- Android教程
- 区块链
- Docker
- 大数据
- 云计算